RecyclerView Multiple View Types Explained – Build Dynamic Lists Like Chat Apps (Kotlin & Java)
Learn how to implement multiple view types in RecyclerView. Build chat UI, mixed lists, and dynamic layouts using Kotlin and Java.

Introduction
In real-world apps, lists are rarely simple.
You often see:
-
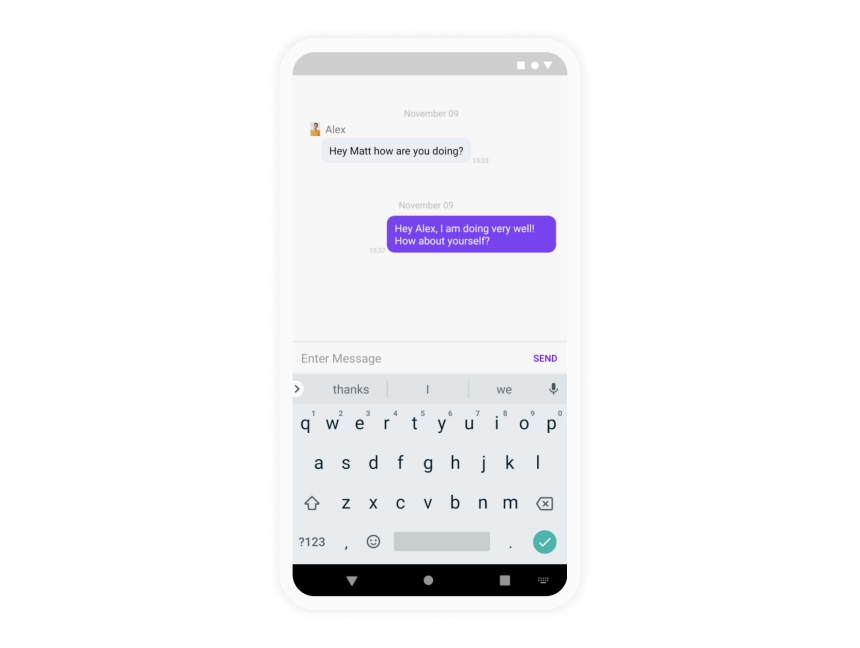
Chat apps → Sent & received messages
-
E-commerce apps → Products + banners
-
News apps → Headlines + ads
-
POS apps → Items + totals + headers
All these require different layouts inside the same RecyclerView.
This is where Multiple View Types come into play.
What are Multiple View Types?
Multiple View Types allow RecyclerView to display different layouts in a single list.
Example (Chat App):
User B: Hi (Right layout)
User A: How are you (Left layout)
Each message uses a different layout.
Why Use Multiple View Types?
Because real apps need:
-
Dynamic UI
-
Different item styles
-
Flexible list design
Without this, you cannot build:
-
Chat apps
-
Mixed content feeds
-
Complex dashboards
Core Concept
RecyclerView decides layout based on:
This method returns the type of item.
Example:
1 → Right message
Step-by-Step Implementation
Step 1 – Define View Types
Example:
const val TYPE_LEFT = 0
const val TYPE_RIGHT = 1
}
Step 2 – Override getItemViewType()
Example:
return if (items[position].isSender) TYPE_RIGHT else TYPE_LEFT
}
RecyclerView uses this to decide layout.
Step 3 – Inflate Different Layouts
Inside onCreateViewHolder():
return if (viewType == TYPE_RIGHT) {
val view = LayoutInflater.from(parent.context)
.inflate(R.layout.item_right, parent, false)
RightViewHolder(view)
} else {
val view = LayoutInflater.from(parent.context)
.inflate(R.layout.item_left, parent, false)
LeftViewHolder(view)
}
}
Different layouts for different types.
Step 4 – Create Multiple ViewHolders
Example:
val message = view.findViewById<TextView>(R.id.leftText)
}
class RightViewHolder(view: View) : RecyclerView.ViewHolder(view) {
val message = view.findViewById<TextView>(R.id.rightText)
}
Step 5 – Bind Data Accordingly
Example:
val item = items[position]
when (holder) {
is LeftViewHolder -> holder.message.text = item.text
is RightViewHolder -> holder.message.text = item.text
}
}
RecyclerView handles both layouts.
Java Example (Basic)
public int getItemViewType(int position) {
return items.get(position).isSender ? 1 : 0;
}
Same logic as Kotlin.
Real Example – Chat Application
Message types:
Received Message → Left layout
RecyclerView dynamically switches layouts.
This is how WhatsApp works.
Real Example – E-commerce App
List:
Product 1
Product 2
Ad
Product 3
Different layouts:
-
Banner layout
-
Product layout
-
Ad layout
All inside one RecyclerView.
Real Example – POS Billing Screen
List:
Item 1
Item 2
Item 3
Total Row
Different view types:
-
Header
-
Item
-
Footer (Total)
This creates professional UI.
Advantages of Multiple View Types
-
Flexible UI
-
Clean architecture
-
Reusable layouts
-
Supports complex screens
Essential for real apps.
Common Beginner Mistakes
❌ Not overriding getItemViewType()
❌ Using single ViewHolder for all types
❌ Mixing logic in one layout
❌ Not handling binding correctly
Always separate view types clearly.
Performance Consideration
RecyclerView still recycles views based on type.
Example:
Right items reuse right views
This keeps performance optimized.
Interview-Level Answer
If interviewer asks:
“How to implement multiple view types in RecyclerView?”
Professional answer:
Override getItemViewType() to return different view types, inflate different layouts in onCreateViewHolder(), and bind data accordingly using multiple ViewHolder classes.
Simple Summary
Flow:
↓
onCreateViewHolder()
↓
onBindViewHolder()
Different types → Different layouts → Same RecyclerView.
Conclusion
RecyclerView Multiple View Types is a powerful concept that allows you to build dynamic and complex UI structures inside a single list.
Whether it’s chat apps, e-commerce feeds, or POS billing systems, this feature is essential for real-world Android development.
Mastering this concept will significantly improve your ability to build professional Android applications.
Share
What's Your Reaction?
 Like
0
Like
0
 Dislike
0
Dislike
0
 Love
0
Love
0
 Funny
0
Funny
0
 Angry
0
Angry
0
 Sad
0
Sad
0
 Wow
0
Wow
0