Flutter Setup & Installation: Step-by-Step Guide + Your First Flutter App
Learn how to install Flutter step by step on Windows, macOS, or Linux and build your first Flutter app. A complete beginner-friendly guide to Flutter setup and first run.

Introduction
Before you start building beautiful applications with Flutter, the first and most important step is setting up the Flutter development environment correctly.
In this guide, you will learn how to install Flutter step by step and create your very first Flutter application. This article is written for beginners, so every step is explained clearly without assuming prior experience.
System Requirements
Before installing Flutter, make sure your system meets the basic requirements.
- Operating System: Windows, macOS, or Linux
- Disk Space: At least 2.8 GB (excluding IDE)
- Internet connection for downloading SDK and tools
Step 1: Download Flutter SDK
Flutter is distributed as a compressed SDK file. Download the Flutter SDK for your operating system from the official Flutter website.
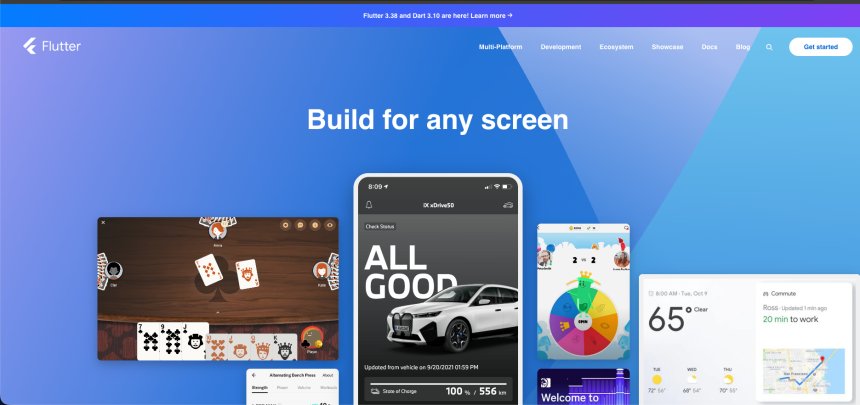
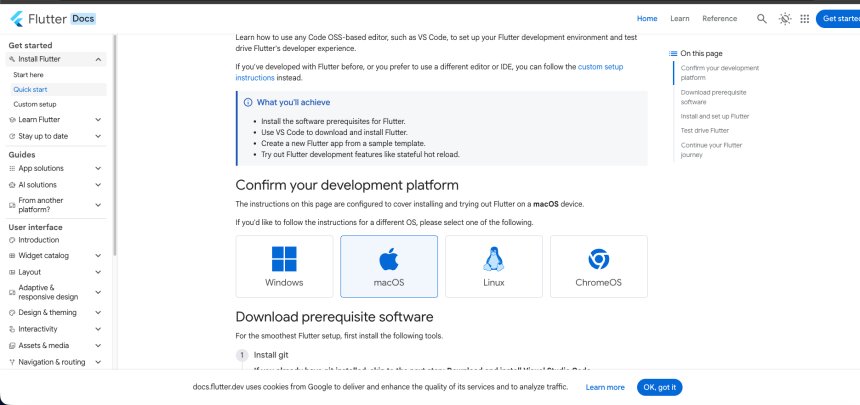
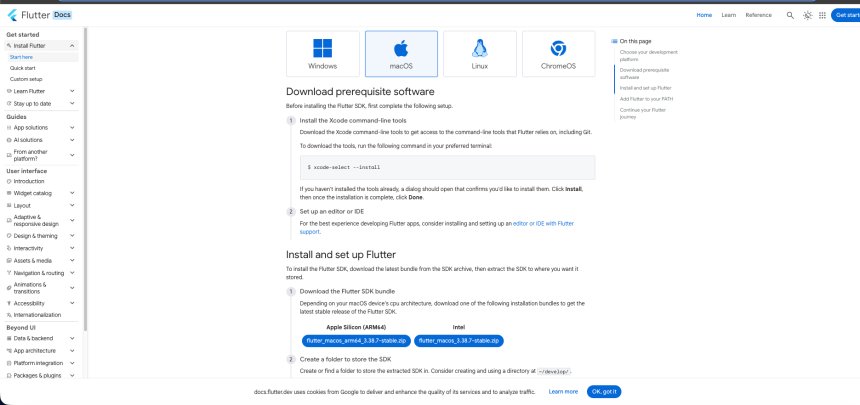
After downloading, extract the Flutter SDK to a preferred location on your system. Avoid placing it inside protected directories.
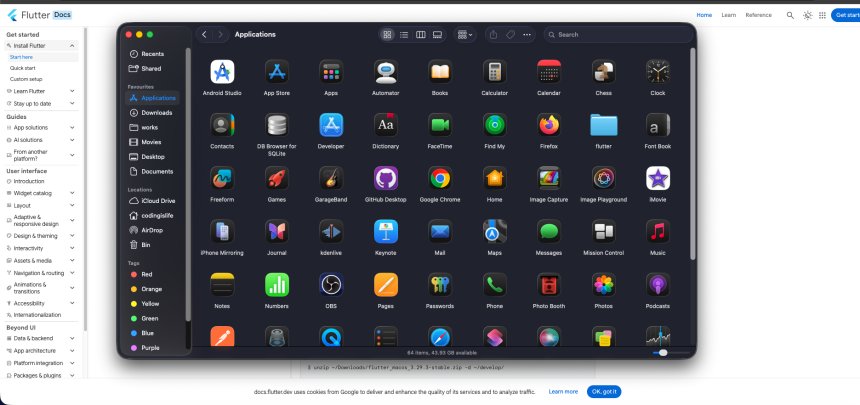
Step 2: Set Flutter Path
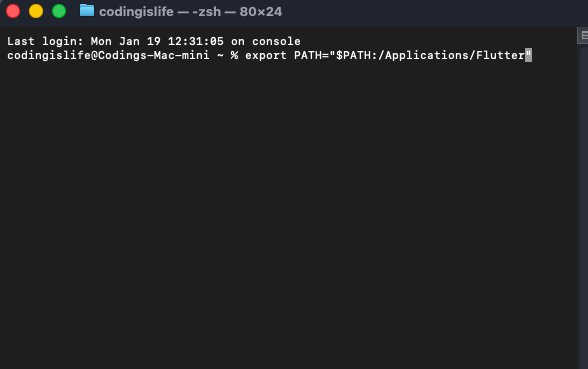
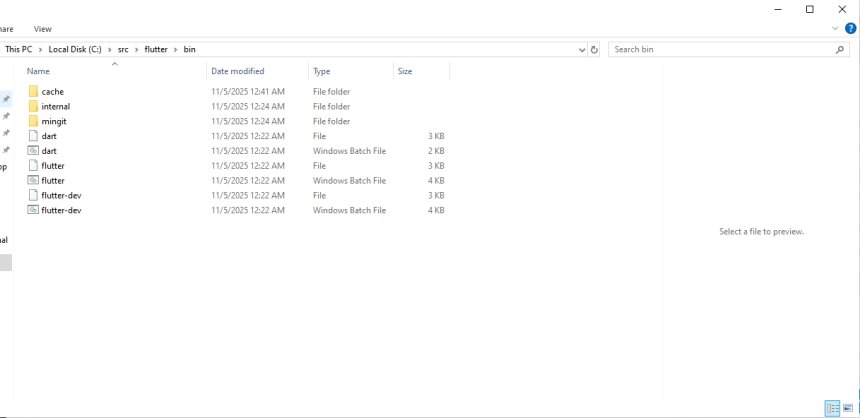
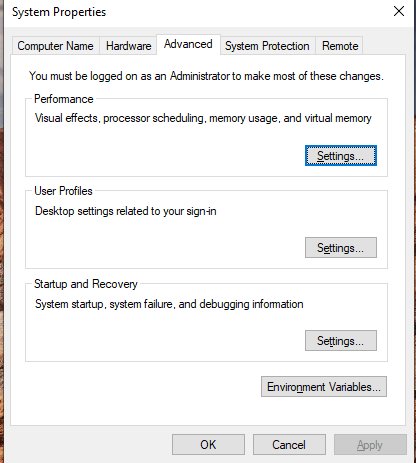
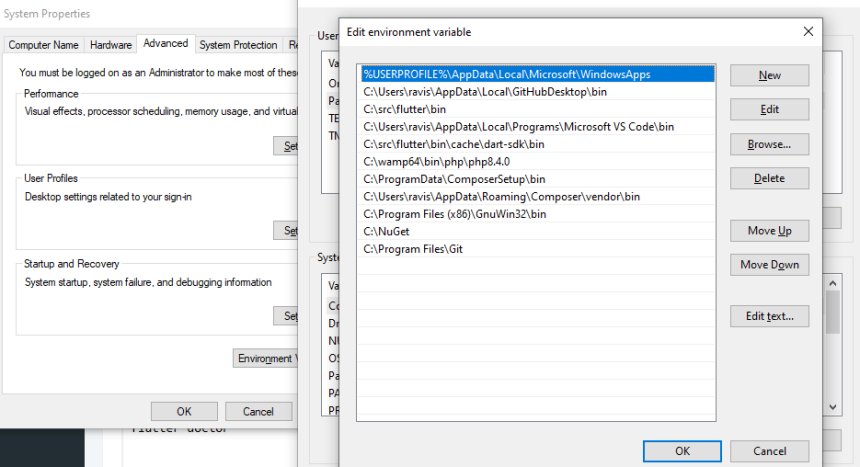
After extracting the SDK, you need to add Flutter to your system path so it can be accessed from the terminal or command prompt.
For macOS and Linux
export PATH="$PATH:/path-to-flutter/flutter/bin"
For Windows
Add the Flutter bin folder path to your Environment Variables.
Step 3: Verify Flutter Installation
Open your terminal or command prompt and run the following command:
flutter doctor
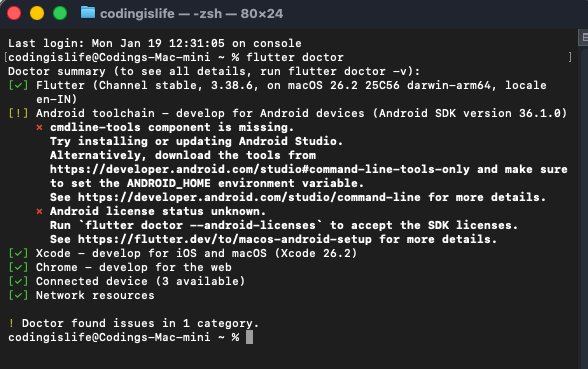
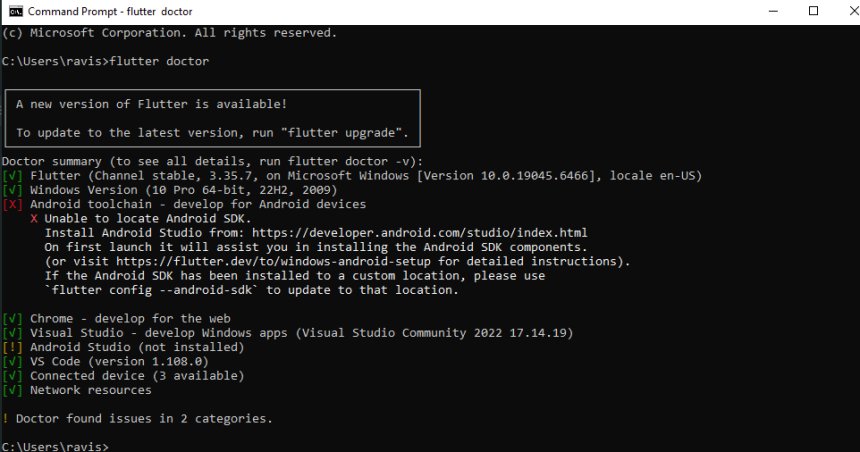
This command checks your environment and shows which dependencies are missing. Flutter Doctor is very useful and should be run whenever you face setup issues.
Step 4: Install Required Tools
Depending on the platform you are targeting, Flutter may require additional tools.
Android Development
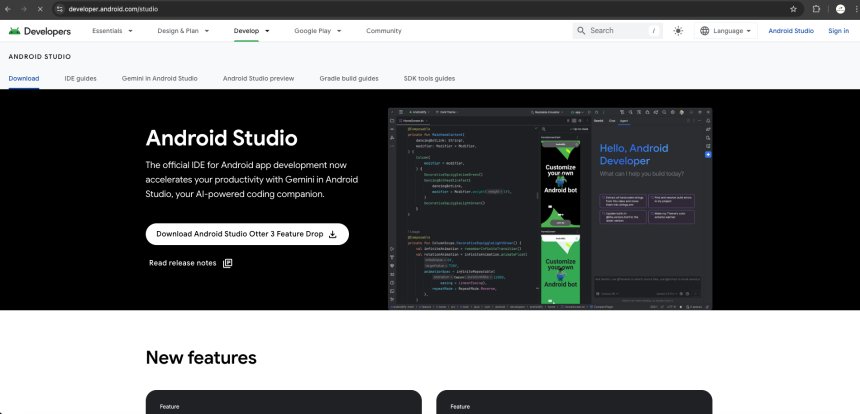
- Install Android Studio
- Install Android SDK
- Enable Android emulator or connect a real device
iOS Development (macOS only)
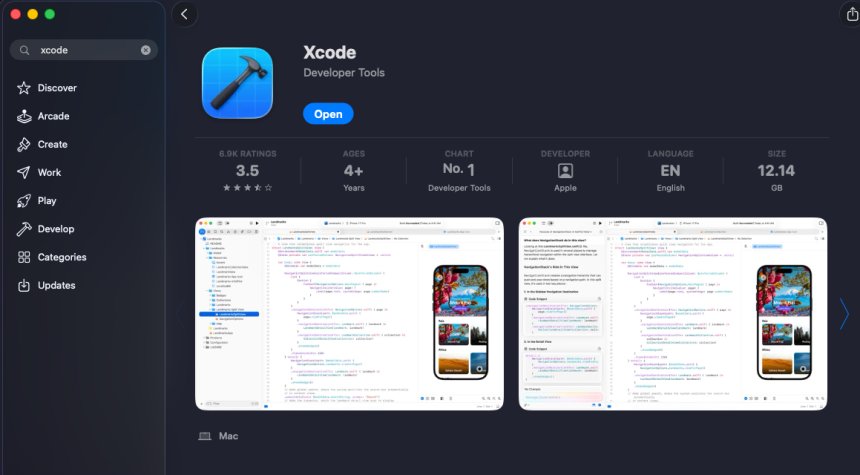
- Install Xcode
- Accept Xcode license
- Install iOS Simulator
Step 5: Choose an IDE
Flutter supports multiple IDEs, but the most commonly used ones are:
- Android Studio
- Visual Studio Code
Install the Flutter and Dart plugins in your IDE to get features like code completion, debugging, and hot reload.
Step 6: Create Your First Flutter App
Once Flutter is installed and verified, you are ready to create your first Flutter application.
flutter create my_first_app
This command creates a new Flutter project with all required files and folders.
Project Structure Overview
After creating the project, you will see several folders and files. Some important ones include:
- lib folder: contains Dart source code
- main.dart: entry point of the application
- pubspec.yaml: manages dependencies and assets
Understanding main.dart
The main.dart file is the starting point of every Flutter app. It contains the main function and the root widget of the application.
void main() {
  runApp(MyApp());
}
The runApp function tells Flutter which widget should be displayed on the screen.
Running Your First Flutter App
Connect a physical device or start an emulator, then run:
flutter run
Flutter builds the app and launches it on the selected device. If everything is set up correctly, you will see the default Flutter counter app.
Understanding Hot Reload
One of Flutter’s most powerful features is Hot Reload. It allows you to see UI changes instantly without restarting the app.
Simply save your code changes, and Flutter updates the app in real time. This makes development fast and enjoyable.
Common Setup Issues
Some common issues beginners face include:
- Flutter not added to system path
- Android SDK not detected
- No connected devices found
Running flutter doctor usually points you in the right direction.
Best Practices for Beginners
- Always check flutter doctor after setup
- Keep Flutter SDK updated
- Use a real device for better performance
- Learn basic Dart concepts alongside Flutter
Conclusion
Setting up Flutter correctly is the first step toward becoming a Flutter developer. Once the setup is complete, creating and running your first app becomes easy and exciting.
With Flutter installed and your first app running, you are now ready to explore widgets, layouts, navigation, and state management in upcoming lessons.
Share
What's Your Reaction?
 Like
0
Like
0
 Dislike
0
Dislike
0
 Love
0
Love
0
 Funny
0
Funny
0
 Angry
0
Angry
0
 Sad
0
Sad
0
 Wow
0
Wow
0